Fixing a mouse's scrollwheel
It's been a while since I haven't written anything and it's probably because I am not yet totally used to share my ideas and achievements on this blog. Recently I achieved something I felt worthwhile to share here, I even took a few picture that I put at the end.
The scrolling issue
A few days ago I finally took it upon myself to fix my favorite mouse's scrollwheel. I have had this mouse for probably something like 4 to 5 years and I really like it because it's a big mouse that fits my palm well and this way reduce the strain on my wrist as well as feels quite pleasant to hold. The problem tho is that after a year of usage the scrolling started to go haywire, when scrolling down it would sometimes scroll up randomly and when scrolling up the reverse was true. This is quite a frustrating issue since it makes the scrolling very unreliable and sometimes while scrolling fast you totally lose track of how far down or up you are… Quickly after it started becoming unreliable, I started to look online for ideas on what might be wrong and how to fix it. I found a few articles on how to open and clean the mouse, especially the scrollwheel component. Everything I tried did not work, the scrolling was still unreliable. I vaguely remember seeing an article about someone with the same mouse model who solved the issue by ordering a new scrollwheel component and changing it. As I didn't have access to a soldering iron at the time and close to no experience soldering electronics I gave up on the idea and got used to dragging the scrollbars and keyboard navigation. During the next 4 years there were still instances where I wish I had a working scrollwheel.
Repairing is the future
Fast-forward to today where I bought a second-hand soldering iron from a friend, gained some skills in soldering and felt confident enough that I could fix the scrollwheel. I already used to value a lot fixing things and not throwing them away, but nowadays I realized the terrible mistake to think that it's ever okay to "just buy something new and throw away the old one" when something doesn't work as expected, at the very least we should assess why it's better to buy new and understand the consequences of such a decision. So with much more resolve to follow my values I decided that it was time to get ready for the future and fix my mouse. And yes I said future, and I don't believe that in the future we will be able to obtain brand new electronic components by clicking 3 times on the internet. Not only that, but I want to avoid buying new things as much as possible anyway and especially electronic goods since they are particularily bad when we think in terms of environmental and humanitarian damages. Convinced that the scrollwheel component was defectuous and confident in my soldering skills to replace it, I was left with another problem to solve: finding a working scrollwheel component! It's quite hard to find second-hand specific electronic components, so it would seem that I have no choice but to order some components online, unless I can think of another viable solution… And yes, there is one: Scavenging! Doesn't sound very futuristic, but maybe it actually does?
Let's get started!
Hopefully, I already had a few mouses that I hoarded over the years so no need to go dumpster diving just yet. So my methodology was quite simple and empirical: Visually assess that the component looks the same size as the broken one, check that the wheel would fit in (the wheel seems like a non standard size compared to all the other scrollwheels) and pick that one. While openning the few mouses I had, one of them had a scrollwheel component that was the same size, so I unsoldered it and used it to replace the component on my main mouse. Unsoldering was actually the hardest part as I didn't have the propper tools for it and the solder wig I used to "remove" the solder was quite ineffective. I even required another pair of hands (my sister's) to help me with the task. I am highly considering acquiring a solder pump and a third hand to make such endeavors less arduous. I was especially afraid of damaging the PCB on the mouse I wanted to fix as it looked quite burnt from the heat while desoldering and slightly bent from the pulling. But luckily nothing broke and it ended up having no ill-effects. Once the components where desoldered, I just had to throw away the broken one (I am not sure it's even possible fix a flaky srcollwheel component) and solder the "new" one on the PCB. Whew, and we're done! In total it took me 1h30min to finish and it was my very first time doing it, so I would deem it a reasonable task size and especially well suited for beginner/wannabe "tech-scavenger".
Conclusion
Everything turned out well and although it was quite a messy job without the proper tools, I am very satisfied with the result: The scroll now works flawlessly and I learnt quite a bit as this was my first experience salvaging electronic components. Mouses are surprisingly simple electronic devices, fairly standard (they all use roughly the same components) and, to my surprise, quite sturdy. They make a perfect target for a first step into salvaging and repairing electronics. Next time, think about it twice before trowing a mouse if the right click stops working, all the other components most probably still work fine, and given two or three hours with proper guidance, any novice could probably fix it. Given that I can find the same mouse for aproximately 30$ on Ebay, I guess it might not look the most efficient use of time, but it's definitely an amazing feeling to achieve something in total accordance with one's own values!
I'll add a few pictures to illustrate what I was talking about, and feel free to contact me if you have questions, seek advice regarding broken mouses, or just want to say hi. I'll answer to the best of my ability. See you around.
Bonus: Pictures
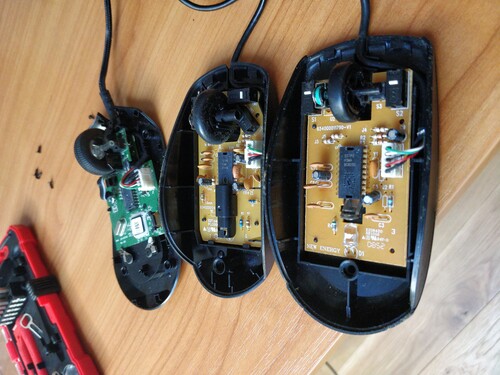
Figure 1: The three mouses I opened, the one with the green PCB is the one I tried to fix the two others (middle and left one) are the ones I opened in order to salvage the scrollwheel component.
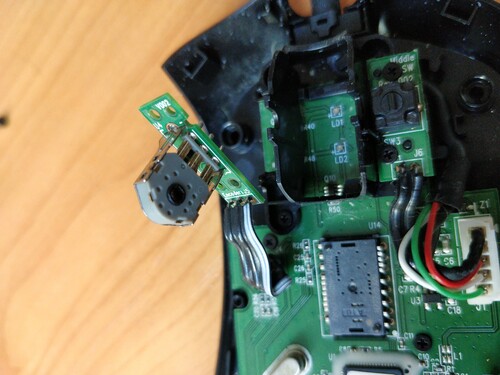
Figure 2: The defectuous scrollwheel component.
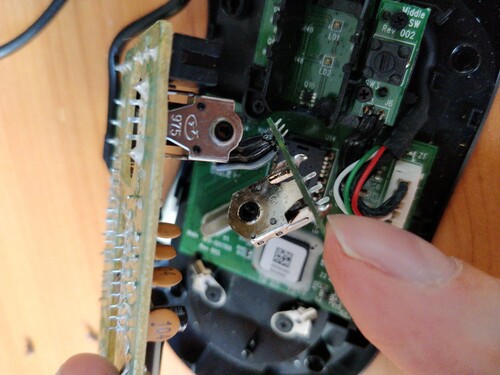
Figure 3: The two components look very similar in size, so it's probably a suitable replacement.
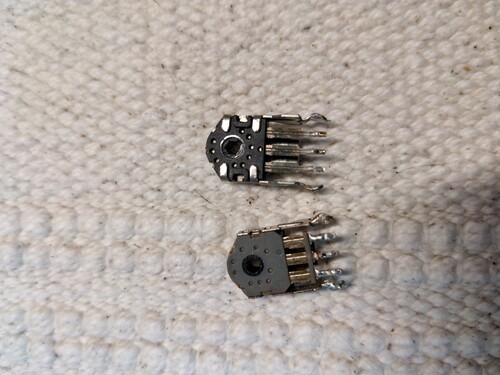
Figure 4: It's even more flagrant once they were desoldered, the left one is defectuous and the right one will be its replacement.
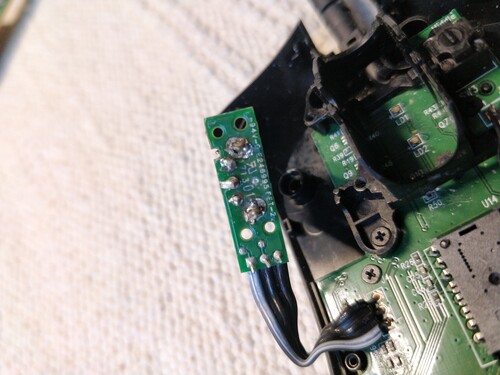
Figure 5: The new component is now soldered, it's not really pretty and clean but it works.
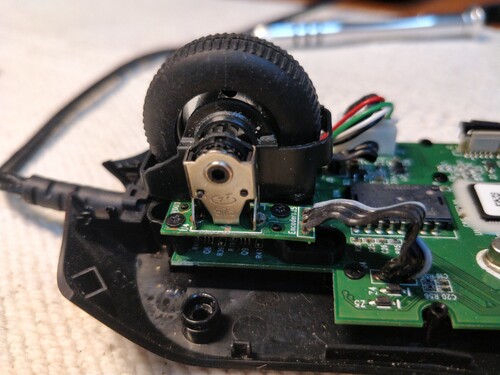
Figure 6: Everything is soldered and screwd back in place, we can see here that the little PCB under the scrollwheel component is slightly bent. This is due to the combination of heat and strong pulling when desoldering. Fortunately it is very sturdy and the slight damage had no unwanted side-effects.